Are you tired of looking at those swirl marks and scratches on your car’s paint job? Well, it’s time to give it some TLC with the three stages of car polishing! In this article, we’ll take a closer look at the process of polishing your car and what you can expect from each stage. Whether you’re a seasoned car enthusiast or a beginner, this guide will give you the information you need to give your car the shine it deserves. So, let’s get started and explore the three stages of car polishing!
The three stages of car polishing are: 1) Correcting imperfections: This stage involves removing oxidation, swirls, and other defects from the paint surface using compounds and polishes. 2) Polishing: This stage involves using progressively finer grits of polish to remove any remaining defects and create a smooth, shiny finish. 3) Waxing or sealing: This stage involves applying a wax or sealant to protect the paint from the elements and maintain the shine. It’s important to note that the specific steps and products used in each stage may vary depending on the type of paint and level of shine desired.
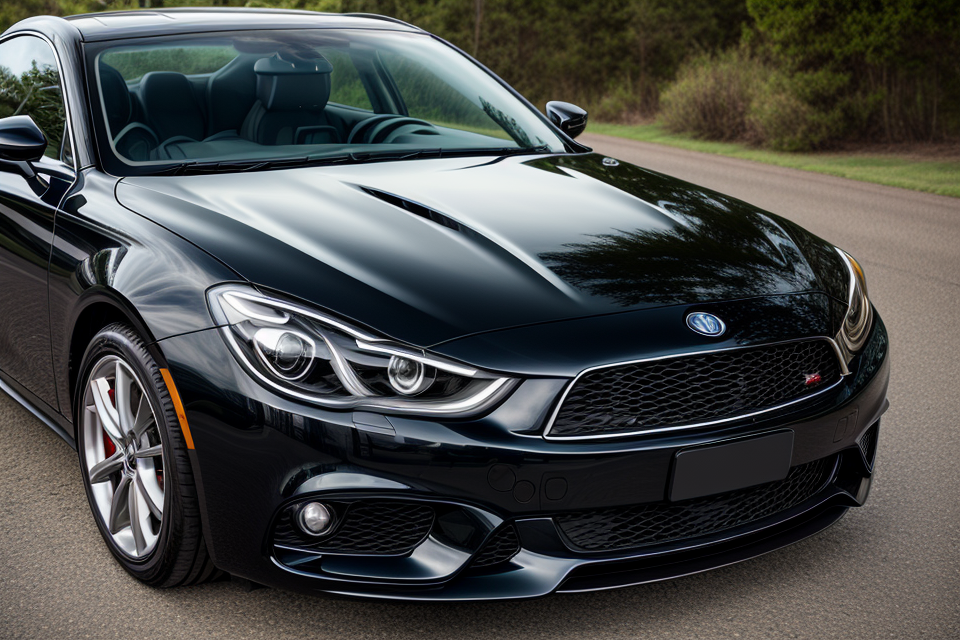
Stage 1: Cleaning the Car’s Surface
Removing Dirt and Debris
Removing dirt and debris is the first step in the process of car polishing. It is important to ensure that the car’s surface is free from any contaminants that may affect the polishing process or the final outcome.
To remove dirt and debris, you can use a soft brush or a car wash mitt. The brush or mitt should be soft to avoid scratching the car’s surface. Start from the top of the car and work your way down to the bottom. Pay extra attention to the areas with visible dust buildup, such as the wheels, window edges, and roof.
It is also important to rinse the car with water before starting the polishing process. This will help to remove any loose dirt and debris that may be present on the surface of the car. It is recommended to use a high-pressure water source for this step to ensure that the water is able to reach all areas of the car.
After rinsing the car, you can use a specialized car wash solution to remove any remaining dirt and debris. This solution will help to break down any stubborn grime and leave the car’s surface clean and ready for polishing.
In summary, removing dirt and debris is a crucial step in the car polishing process. It ensures that the car’s surface is clean and free from any contaminants that may affect the polishing process or the final outcome.
Washing the Car
When it comes to washing your car, it’s important to start with a clean surface. Here are some steps to follow:
- Choose the right soap: You’ll need a car wash soap or a mild dish soap and water to wash your car. Avoid using household cleaners or soaps, as they can damage the car’s paint.
- Apply the soap: Squirt the soap onto a soft sponge or wash mitt and work it into a lather. Make sure to cover the entire surface of the car.
- Wash the car: Start washing the car from the top and work your way down to the bottom. Use a gentle touch when washing the car, and avoid scrubbing too hard, as this can cause scratches.
- Rinse thoroughly: Be sure to rinse the soap off thoroughly before drying the car. This will help to remove any soap residue that could damage the paint.
Remember, washing your car regularly is important to keep it looking its best and to prevent damage to the paint.
Drying the Car
Drying the car is an essential step in the car polishing process, as it ensures that all the dirt, debris, and moisture are removed from the surface of the car. The following are some steps that you can follow to dry your car:
- Use a microfiber towel or chamois: A microfiber towel or chamois is highly absorbent and can effectively remove any remaining moisture from the car’s surface. These towels or chamois are specifically designed to be used with water-based cleaners, and they will not leave any lint or residue behind.
- Start from the top of the car: When drying your car, it is important to start from the top and work your way down to the bottom. This will help prevent water spots or swirls from forming on the surface of the car.
- Avoid using a towel or chamois that is too dry or too wet: If the towel or chamois is too dry, it may cause water spots or swirls on the surface of the car. On the other hand, if the towel or chamois is too wet, it may leave water spots or streaks on the surface of the car. Therefore, it is important to use a towel or chamois that is just damp enough to remove any remaining moisture from the car’s surface.
- Use a clean towel or chamois for each section of the car: To avoid spreading dirt or debris around the car’s surface, it is important to use a clean towel or chamois for each section of the car. This will help ensure that the car’s surface is thoroughly clean and free of any impurities.
- Buff the car’s surface: After drying the car, it is important to buff the surface using a soft, clean cloth. This will help remove any remaining moisture and prevent water spots or swirls from forming on the surface of the car.
By following these steps, you can effectively dry your car’s surface and prepare it for the next stage of car polishing.
Stage 2: Correcting Imperfections
Identifying Imperfections
When it comes to car polishing, the first step is to identify the imperfections on the car’s surface. There are several types of imperfections that you may encounter, including swirls, scratches, and oxidation. Here’s how you can identify each type of imperfection:
Swirls
Swirls are small, circular scratches that appear on the car’s surface due to incorrect washing or waxing techniques. They can also be caused by loose change or other objects rubbing against the car’s paintwork. To identify swirls, look for fine, hazy lines or cloudy areas on the car’s surface. These areas may appear lighter or darker than the surrounding paintwork.
Scratches
Scratches are deeper than swirls and are caused by abrasive objects such as branches, keys, or stones. They can also be caused by accidental impacts from other objects, such as rocks or curbs. To identify scratches, look for longer, more visible lines or grooves on the car’s surface. These areas may appear shiny or dull, depending on the angle of the light.
Oxidation
Oxidation is a chemical reaction that occurs when the car’s paintwork is exposed to the air. It can cause the paintwork to turn yellow, brown, or gray, and can also cause a dull, chalky texture. To identify oxidation, look for discoloration on the car’s surface. This may appear as a uniform change in color across the car’s body or as patches of discoloration in certain areas.
Once you have identified the imperfections on your car’s surface, you can begin to correct them using a detailing clay or a swirl remover. Be sure to apply the clay or remover to a small area at a time and work it in a circular motion to avoid missing any imperfections.
Polishing the Car
Polishing the car is the second stage of car polishing, and it is crucial to achieving a smooth and shiny finish. The process involves the use of a polishing compound to remove any remaining imperfections and restore the car’s shine.
To polish the car, follow these steps:
- Choose the right polishing compound for your car’s paint type. There are different types of polishing compounds available, and it is essential to choose the right one for your car’s paint type to avoid damaging it.
- Apply the polish in a thin, even layer and work it in a circular motion. Start from the top of the car and work your way down to the bottom. Use a clean, soft cloth to apply the polish evenly on the surface of the car.
- Work in small sections at a time. Focus on one section of the car at a time, and move in a linear pattern to ensure that the entire car is covered evenly.
- Use a polishing machine or by hand. You can use a polishing machine or do it by hand. If you choose to use a machine, make sure it is set to the correct speed and use a foam pad to prevent scratches.
- Remove the polish residue thoroughly. Once you have finished polishing the car, rinse it thoroughly with water to remove any polish residue. Dry the car with a clean, soft cloth to prevent water spots.
It is important to note that polishing the car can cause swirls and scratches if not done correctly. To avoid this, it is recommended to use a cutting compound first to remove any imperfections before polishing the car.
Stage 3: Applying a Protectant
Choosing a Protectant
Choosing the right protectant for your car is an important step in the car polishing process. There are several types of protectants available, each with its own unique benefits and drawbacks. Understanding the pros and cons of each type of protectant can help you make an informed decision that will best suit your car’s surface and your driving conditions.
Common Types of Protectants
There are several common types of protectants that you can choose from, including:
- Waxes: Waxes are a traditional type of protectant that provide a good shine and are relatively easy to apply. They are often made from natural or synthetic waxes and can provide a range of benefits, such as UV protection and water repellency.
- Sealants: Sealants are a more advanced type of protectant that provide a long-lasting barrier against environmental damage. They are often made from synthetic polymers and can provide a range of benefits, such as durability, UV protection, and water repellency.
- Ceramic coatings: Ceramic coatings are a newer type of protectant that provide a highly durable barrier against environmental damage. They are made from ceramic particles and can provide a range of benefits, such as long-lasting protection, UV protection, and water repellency.
Considerations When Choosing a Protectant
When choosing a protectant, there are several factors to consider, including:
- Surface type: The type of surface on your car will determine the best type of protectant to use. For example, a wax may be the best choice for a painted surface, while a sealant or ceramic coating may be better for a clear coat or other more advanced surface.
- Driving conditions: Your driving conditions will also play a role in determining the best type of protectant to use. For example, if you live in an area with high levels of sunlight, a protectant with high UV protection may be the best choice. If you live in an area with harsh winters, a protectant with anti-freeze properties may be the best choice.
- Durability: The level of durability you need from your protectant will also play a role in your decision. Waxes tend to wear off more quickly than sealants or ceramic coatings, but they are easier to apply and remove. Sealants and ceramic coatings are more durable, but they can be more difficult to apply and may require professional installation.
Overall, choosing the right protectant for your car is an important step in the car polishing process. By considering the type of surface on your car, your driving conditions, and the level of durability you need, you can choose a protectant that will provide long-lasting protection and keep your car looking great.
Applying the Protectant
Applying a protectant is the final stage of car polishing. It is essential to follow the manufacturer’s instructions for applying the protectant to ensure the best results. Here are the steps to apply the protectant:
- Choose the right product: Select a high-quality protectant that is designed for your car’s surface. This will help to prevent damage and maintain the shine.
- Prepare the surface: Clean the surface thoroughly to remove any dirt, dust, or debris. This will help the protectant to adhere better and last longer.
- Apply the protectant: Apply the protectant in a thin, even layer and work it in a circular motion. This will help to ensure that the protectant is evenly distributed and doesn’t leave any streaks or bubbles.
- Allow the protectant to dry: Allow the protectant to dry according to the manufacturer’s instructions. This will help to ensure that the protectant is fully cured and will last longer.
- Remove excess protectant: Use a soft cloth to remove any excess protectant. This will help to prevent the protectant from building up and causing damage to the surface.
By following these steps, you can ensure that your car’s surface is protected and will remain shiny for a long time.
FAQs
1. What are the three stages of car polishing?
The three stages of car polishing are:
1. Compounding: This is the first stage of car polishing and involves removing the surface contaminants such as dust, dirt, and oxidation that can dull the paint surface. Compounding is done using a compound that is applied to the paint and then buffed off using a polishing pad.
2. Polishing: This is the second stage of car polishing and involves removing the swirls, scratches, and other imperfections from the paint surface. Polishing is done using a polishing compound that is applied to the paint and then buffed off using a polishing pad.
3. Waxing/Sealing: This is the final stage of car polishing and involves applying a protective coating to the paint surface to enhance the shine and protect the paint from environmental factors such as UV rays, acid rain, and bird droppings. Waxing or sealing is done using a carnauba wax or a synthetic sealant.
2. Why is it important to follow the three stages of car polishing?
It is important to follow the three stages of car polishing to achieve a high-quality finish and to protect the paint surface. Compounding removes the surface contaminants that can damage the paint, polishing removes the imperfections that can dull the paint, and waxing or sealing protects the paint from environmental factors. If any of these stages are skipped, it can result in an uneven finish or a lack of protection for the paint.
3. How often should I perform the three stages of car polishing?
The frequency of car polishing depends on the condition of the paint and the environment in which the car is used. As a general rule, it is recommended to perform the three stages of car polishing every 3-6 months for most cars. However, if the car is used in a highly polluted area or exposed to harsh environmental conditions, it may need to be polished more frequently.
4. Can I skip any of the three stages of car polishing?
No, it is not recommended to skip any of the three stages of car polishing. Each stage is important in achieving a high-quality finish and protecting the paint surface. Skipping any of the stages can result in an uneven finish or a lack of protection for the paint.
5. Can I use car polishing products myself or do I need a professional?
Car polishing products are available for both professional and DIY use. While it is possible to perform the three stages of car polishing yourself, it is recommended to seek the help of a professional if you are not experienced in car detailing. A professional will have the knowledge and experience to use the correct products and techniques to achieve a high-quality finish and avoid damaging the paint.


