Are you tired of driving around with dull and cloudy headlights? Do you want to restore the brightness and clarity of your headlights without breaking the bank? Look no further! In this guide, we will explore the number one headlight restoration kit that will revitalize your headlights and give you a brighter, safer driving experience.
Whether you’re a car enthusiast or just want to keep your vehicle in top condition, this guide is for you. We’ll dive into the features and benefits of the top headlight restoration kit, as well as how to use it for maximum results. So, get ready to say goodbye to foggy headlights and hello to a clearer, brighter ride.
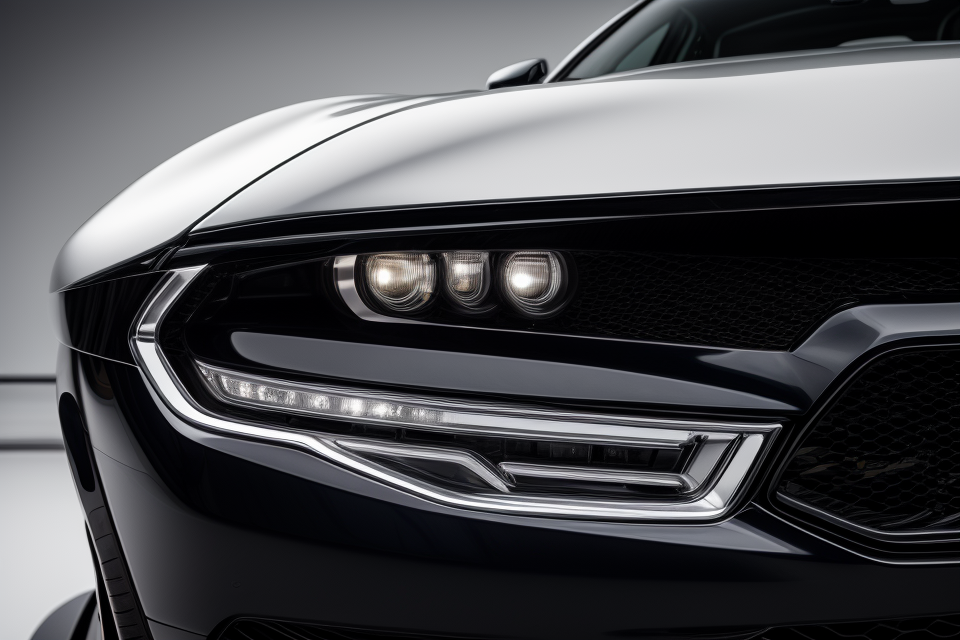
What Are Headlight Restoration Kits?
Why Are They Necessary?
- Fading headlights are a common problem faced by many car owners.
- The cause of this problem is the natural breakdown of the protective clear coat on the headlight lens, which allows UV rays to damage the headlights.
- Over time, the damage can become so severe that the headlights become cloudy and hard to see through, leading to a dangerous situation while driving at night.
- Headlight restoration kits are designed to restore the clarity of the headlights and make them as clear as new.
- These kits are necessary because they offer a cost-effective and easy solution to the problem of fading headlights.
- Additionally, restoring the headlights can also improve the appearance of the car, making it look newer and more attractive.
- With the use of a headlight restoration kit, car owners can ensure their safety while driving at night and improve the resale value of their vehicle.
Types of Headlight Restoration Kits
Headlight restoration kits come in different types, each designed to address specific issues that may be affecting the appearance and performance of your headlights. Here are some of the most common types of headlight restoration kits:
- UV Repair Kits: These kits use ultraviolet light to cure a special resin that fills in scratches and other imperfections in the headlight surface. UV repair kits are a popular choice for minor damage and can be completed in under an hour.
- Headlight Restoration Systems: These kits include a combination of polishing compounds, waxes, and sealants to restore the clarity and brightness of your headlights. They typically come with a dual-action polisher that makes the process easier and more efficient.
- Headlight Tinting Kits: These kits use a special film to change the color or tint of your headlights. This can be a good option if you want to improve the appearance of your car without spending a lot of money on a full restoration.
- Headlight Covers: These are pre-made covers that fit over your headlights to improve their appearance. They can be a quick and easy solution for minor damage or yellowing, but they may not last as long as a full restoration.
When choosing a headlight restoration kit, it’s important to consider the specific issues you’re facing and the level of restoration you want to achieve. If you have significant damage or discoloration, a more comprehensive kit may be necessary. However, even a basic kit can make a big difference in the appearance and performance of your headlights.
Choosing the Right Headlight Restoration Kit
Factors to Consider
When selecting a headlight restoration kit, there are several factors to consider. Here are some key elements to keep in mind to ensure you choose the right kit for your needs:
- Quality of the Restoration Kit: Look for a kit that uses high-quality materials and has a proven track record of effectively restoring headlights. Some kits may contain cheaper alternatives, which can lead to a lower quality restoration.
- Ease of Use: The kit should be easy to use, with clear instructions and minimal tools required. If a kit is too complicated or requires too many tools, it may be difficult to use, leading to frustration and a less effective restoration.
- Compatibility with Your Vehicle: Ensure the kit is compatible with your specific make and model of vehicle. Some kits may be designed for a wider range of vehicles, while others may be tailored specifically to certain makes and models.
- Cost: Compare the cost of different kits, taking into account both the upfront cost and any ongoing maintenance or replacement costs. While a higher-priced kit may offer better results, it may not be necessary for all vehicles.
- Customer Reviews and Ratings: Read reviews from other customers who have used the kit to gauge its effectiveness and ease of use. This can provide valuable insights into the kit’s performance and help you make an informed decision.
- Brand Reputation: Research the brand reputation of the kit’s manufacturer. A reputable brand is more likely to produce a high-quality product that delivers the results promised.
- Warranty and Support: Consider the warranty and support offered by the manufacturer. A good warranty can provide peace of mind and a guarantee of quality, while support from the manufacturer can be helpful if you encounter any issues during the restoration process.
Top Picks: Comparison of the Best Headlight Restoration Kits
When it comes to choosing the right headlight restoration kit, there are several options available on the market. Each kit has its own unique features and benefits, making it important to compare them before making a final decision. Here are some of the top picks for headlight restoration kits:
- 3M Perfect-It Refill Kit: This kit is a popular choice among DIY enthusiasts due to its ease of use and affordability. It includes a specially designed abrasive compound that is designed to remove oxidation and other surface imperfections from headlights.
- Tornado® IV: This kit is designed for professional use and is known for its durability and effectiveness. It includes a high-quality abrasive compound that is capable of removing even the toughest headlight scratches and stains.
- Griot’s Garage® 67015 Discus™ Double-Cut Compound Polish: This kit is ideal for those who want a more aggressive polish that can remove deep scratches and other imperfections. It includes a unique formula that is safe for all types of headlight surfaces.
- Mothers® California Gold® Car Care Products MCLR-001-04 Headlight Restoration Kit: This kit is designed to be user-friendly and easy to use, making it a great option for those who are new to headlight restoration. It includes a specially formulated compound that is designed to remove oxidation and other imperfections without leaving any residue behind.
When comparing these kits, it’s important to consider factors such as price, ease of use, and effectiveness. It’s also important to read reviews and compare customer feedback to ensure that you’re making an informed decision. With the right headlight restoration kit, you can bring your headlights back to their original brilliance and enjoy a safer, more comfortable driving experience.
1. 3M Headlight Restoration System
Introduction to 3M Headlight Restoration System
The 3M Headlight Restoration System is a top-of-the-line kit designed to restore the clarity and brightness of your headlights. It is a complete solution that offers an easy and efficient way to remove yellowing and oxidation from your headlights, leaving them looking like new. The kit includes everything you need to get the job done, from cleaning solutions to restoration compounds, making it a popular choice among car owners.
Features of 3M Headlight Restoration System
- Easy to use: The kit comes with clear instructions, making it easy for anyone to use, even if you have no prior experience.
- Complete solution: The kit includes all the necessary cleaning and restoration products you need to get the job done.
- High-quality results: The 3M Headlight Restoration System is designed to deliver high-quality results, leaving your headlights looking like new.
- Durable: The kit’s products are designed to last, ensuring that your headlights stay looking great for longer.
Benefits of Using 3M Headlight Restoration System
- Saves time and money: Restoring your headlights with the 3M Headlight Restoration System is a cost-effective alternative to replacing them, saving you both time and money.
- Improves visibility: By restoring the clarity and brightness of your headlights, you improve your visibility on the road, making it safer for you and other drivers.
- Increases the value of your car: Restored headlights not only look better, but they also increase the value of your car, making it more attractive to potential buyers.
Conclusion
The 3M Headlight Restoration System is a top-quality kit that is designed to deliver high-quality results. Its ease of use, complete solution, and durable products make it a popular choice among car owners. Whether you’re looking to save time and money or simply want to improve the appearance of your car, the 3M Headlight Restoration System is an excellent choice.
2. T-Rex Headlight Restoration Kit
If you’re looking for a headlight restoration kit that delivers impressive results, the T-Rex Headlight Restoration Kit is definitely worth considering. This kit has gained a reputation for its ability to revitalize cloudy and yellowed headlights, leaving them crystal clear and bright. Here’s what you need to know about this top-rated kit:
Components and Tools Included
The T-Rex Headlight Restoration Kit comes with all the necessary components and tools you need to restore your headlights. The kit includes:
- Sanding Papers: The kit comes with a set of progressively finer sanding papers that help to remove the cloudy and yellowed layer from your headlights.
- Polishing Cloth: A soft, non-abrasive polishing cloth is included to remove any residue and dust from the sanding process.
- Adhesive Backed Sanding Discs: These are pre-cut adhesive-backed sanding discs that can be easily applied to your headlights for even sanding.
- Headlight Restoration Compound: The kit includes a specially formulated compound that helps to remove scratches and oxidation from your headlights, leaving them with a clear and shiny finish.
Easy to Use
One of the biggest advantages of the T-Rex Headlight Restoration Kit is its ease of use. The kit comes with detailed instructions that make it easy for anyone to understand the restoration process. The sanding papers and adhesive-backed sanding discs make it simple to apply even pressure and achieve consistent results.
High-Quality Results
The T-Rex Headlight Restoration Kit is known for delivering high-quality results. The specially formulated compound removes scratches and oxidation, leaving your headlights with a clear and shiny finish. The kit works on all types of headlights, including plastic, acrylic, and glass, making it a versatile option for any vehicle.
Affordable Price
Compared to other headlight restoration kits on the market, the T-Rex Headlight Restoration Kit is affordably priced. This makes it a great option for those on a budget who still want to achieve professional-looking results.
In conclusion, the T-Rex Headlight Restoration Kit is a great option for anyone looking to revitalize their headlights. With its easy-to-use components, high-quality results, and affordable price, it’s no wonder why this kit has become a favorite among DIY enthusiasts and professionals alike.
3. Gtechniq G1 ClearVision Headlight Restoration Kit
If you’re looking for a high-quality headlight restoration kit, the Gtechniq G1 ClearVision Headlight Restoration Kit is definitely worth considering. This kit offers a comprehensive solution for restoring the clarity and brightness of your headlights, making them look like new again.
Here are some of the features that make the Gtechniq G1 ClearVision Headlight Restoration Kit stand out:
- Easy to Use: The kit comes with simple instructions and all the tools you need to get started, making it easy for anyone to use, even if you have no prior experience with headlight restoration.
- Safe for All Types of Headlights: The kit is safe to use on all types of headlights, including plastic, acrylic, and glass. It will not damage the surface of your headlights or cause any discoloration.
- Long-Lasting Results: The Gtechniq G1 ClearVision Headlight Restoration Kit uses a special formula that bonds to your headlights, providing long-lasting results that will keep your headlights looking great for months to come.
- Professional-Grade Results: The kit uses the same technology as professional car detailers, allowing you to achieve professional-grade results at home.
Overall, the Gtechniq G1 ClearVision Headlight Restoration Kit is a great choice for anyone looking to revitalize their headlights. It’s easy to use, safe for all types of headlights, and provides long-lasting results that will keep your headlights looking great for months to come.
DIY Headlight Restoration
Preparation
Before starting the headlight restoration process, it is essential to prepare the necessary tools and materials. Here are the steps to follow:
- Gather the materials: To restore your headlights, you will need a headlight restoration kit, sandpaper, a sanding block, a rag, and some rubbing compound. Make sure you have all the necessary materials before you start.
- Clean the headlights: Before you start sanding, it is important to clean the headlights thoroughly. Use a glass cleaner and a rag to remove any dirt, grime, and debris from the headlights. This will help you see the damage more clearly and ensure that the restoration process is effective.
- Identify the damage: Once the headlights are clean, examine them carefully to identify the damage. Look for cracks, chips, and discoloration. Take note of the areas that need the most attention.
- Remove the lens covers: Depending on the type of headlights you have, you may need to remove the lens covers to access the damage. Use a screwdriver or your fingers to carefully remove the covers.
- Apply the restoration kit: Follow the instructions on the restoration kit to apply the restoration compound to the damaged areas. Use a sanding block or sandpaper to smooth out the compound and remove any remaining damage.
- Buff the headlights: Once the compound has dried, use a buffing pad and rubbing compound to remove any haze and bring back the clarity of the headlights.
By following these steps, you can prepare your headlights for restoration and achieve a like-new finish.
Step-by-Step Guide
- Assess the Condition of Your Headlights: Before beginning the restoration process, it’s important to assess the condition of your headlights. Check for cracks, discoloration, and other signs of damage.
- Gather the Tools and Materials: To restore your headlights, you’ll need a few tools and materials. These include a headlight restoration kit, a sanding block, a rag, and some elbow grease.
- Sand the Headlights: The first step in the restoration process is to sand the headlights. Use the sanding block to remove any scratches or defects on the surface of the headlights.
- Clean the Headlights: After sanding, use a rag to wipe away any dust or debris. This will help to ensure that the headlights are clean and free of any dirt or debris that could interfere with the restoration process.
- Apply the Restoration Kit: Next, apply the restoration kit to the headlights. Follow the instructions on the kit to ensure that you’re using it correctly.
- Buff the Headlights: Once the restoration kit has been applied, use a buffing pad to buff the headlights. This will help to restore their clarity and shine.
- Inspect the Headlights: After buffing, inspect the headlights to ensure that they look good. If they don’t, repeat the process until they do.
By following these steps, you can easily restore your headlights to their former glory.
Professional Headlight Restoration Services
Advantages
When it comes to restoring the clarity and brightness of your headlights, professional services offer several advantages. First and foremost, a professional service will ensure that the job is done right, using the best techniques and tools to remove scratches, oxidation, and other damage. This means that your headlights will look like new again, improving the overall appearance of your vehicle.
Another advantage of professional headlight restoration is that it is typically faster and more convenient than doing it yourself. You won’t have to worry about finding the right tools or taking the time to do the work yourself, and you can usually have your headlights restored while you wait.
In addition, professional services often use specialized products and techniques that are not available to the general public. This means that your headlights will be restored to a higher standard, and will last longer before they need to be restored again.
Overall, professional headlight restoration services offer a convenient and effective way to restore the clarity and brightness of your headlights, leaving your vehicle looking like new.
How to Find a Reliable Service Provider
When it comes to having your headlights restored by a professional, it’s important to find a reliable service provider. Here are some tips to help you find the right one:
- Check for Reviews and Ratings
One of the best ways to find a reliable service provider is to check for reviews and ratings from previous customers. Look for service providers with a high rating and positive reviews from customers who have used their services before. - Verify Licenses and Certifications
Make sure that the service provider you choose is licensed and certified to perform headlight restoration services. This will ensure that they have the necessary training and experience to provide high-quality services. - Ask for Referrals
Ask for referrals from friends, family members, or colleagues who have had their headlights restored by a professional. This can help you find a reliable service provider that you can trust. - Check for Insurance
Make sure that the service provider you choose has insurance coverage. This will protect you in case any damage occurs during the restoration process. - Schedule a Consultation
Schedule a consultation with the service provider before making a final decision. This will give you an opportunity to ask questions and get a better understanding of their services and pricing.
By following these tips, you can find a reliable service provider to restore your headlights and ensure that they look like new again.
Tips for Maintaining Your Headlights
Proper maintenance is crucial in ensuring that your headlights remain in good condition for as long as possible. Here are some tips for maintaining your headlights:
- Clean your headlights regularly: Dirt, debris, and grime can accumulate on your headlights over time, reducing their brightness and causing discoloration. Use a soft cloth and mild soap to clean your headlights regularly.
- Avoid harsh chemicals: Harsh chemicals, such as those found in some car washes, can damage your headlights. Instead, use a gentle soap and avoid scrubbing too hard, which can cause scratches.
- Inspect your headlights regularly: Check your headlights for any cracks, chips, or damage regularly. Small cracks can grow over time and eventually cause your headlight to fail.
- Use headlight protectors: Headlight protectors can help prevent damage from rocks, bugs, and other debris. They can also help keep your headlights clean and reduce the need for frequent cleaning.
- Avoid excessive heat: High temperatures can cause your headlights to fade over time. If you’re driving in a hot climate, try to park your car in the shade or use a sunshade to protect your headlights.
By following these tips, you can help extend the life of your headlights and keep them looking their best.
FAQs
1. What is a headlight restoration kit?
A headlight restoration kit is a set of products designed to restore the clarity and brightness of cloudy or yellowed headlights. These kits typically include a combination of cleaning solutions, polishing compounds, and UV-curing resins that work together to remove haze and discoloration, and leave the headlights clear and bright.
2. Why do headlights become cloudy or yellowed?
Headlights can become cloudy or yellowed over time due to a variety of factors, including exposure to the elements, damage from rocks and road debris, and the natural breakdown of the plastic materials used in their construction. This can reduce the visibility of the headlights, making it more difficult to see and be seen while driving.
3. How do headlight restoration kits work?
Headlight restoration kits work by using a combination of cleaning solutions and polishing compounds to remove haze and discoloration from the headlights, and then applying a UV-curing resin to restore the clarity and brightness of the headlights. The exact process will vary depending on the specific kit, but most kits are designed to be easy to use and require little to no special tools or equipment.
4. Can headlight restoration kits be used on all types of headlights?
Headlight restoration kits are generally designed to work on most types of headlights, including plastic, acrylic, and polycarbonate. However, it’s always a good idea to check the compatibility of a specific kit with your particular headlights before purchasing it.
5. How long does it take for headlights to become cloudy or yellowed again?
The rate at which headlights become cloudy or yellowed again will vary depending on a variety of factors, including exposure to the elements, driving habits, and the quality of the restoration. In general, however, headlights that have been restored with a high-quality restoration kit can remain clear and bright for several months to a year or more.
6. How much does a headlight restoration kit cost?
The cost of a headlight restoration kit can vary widely depending on the specific kit and the brand. In general, however, most kits range from $20 to $100. It’s always a good idea to compare prices and read reviews before purchasing a kit to ensure that you’re getting the best value for your money.
7. How long does it take to restore headlights with a kit?
The time it takes to restore headlights with a kit will vary depending on the specific kit and the size of the headlights. In general, however, most kits can be used to restore the headlights in less than an hour. It’s always a good idea to follow the instructions provided with the kit carefully to ensure that the restoration is done correctly and efficiently.
8. Can I use a headlight restoration kit on my own?
Yes, most headlight restoration kits are designed to be easy to use and require little to no special tools or equipment. However, it’s always a good idea to follow the instructions provided with the kit carefully to ensure that the restoration is done correctly and efficiently.


